ONCE YOU GET USED TO taking digital pictures, you get really used to it. My digital cameras feature, elsewhere in this issue, left me with an electronic album of vacation pictures that I turned into an audience-numbing slideshow. And that got me thinking of vacations past, documented only on video (yeah, I’m the guy with his head glued to the eyepiece of a camcorder).

I had an ulterior motive for this project. Last summer I shot some nice video sequences at the beach, and I’ve been promising to forward some footage to the friends who rented the cabin with me. Sending some choice stills through e-mail would take them completely by surprise--and remind them of my formidable technical prowess.
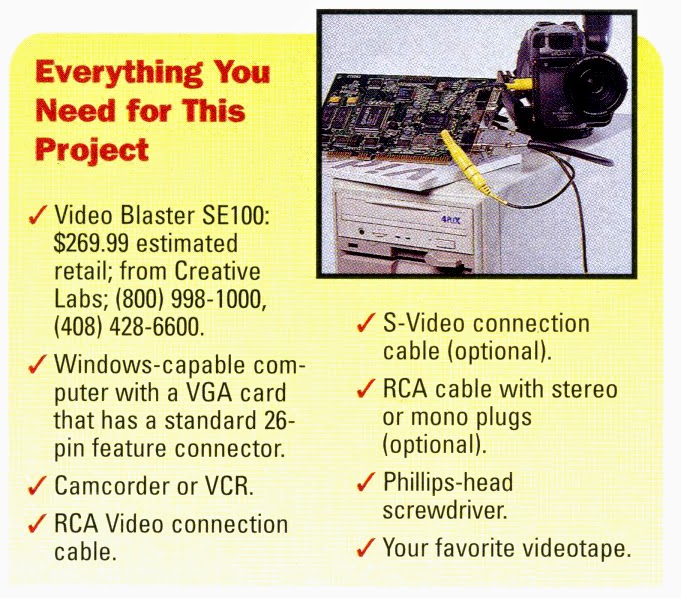
What’s needed, then, is that camcorder, a computer with a good graphics environment (I’m using Windows 95), and a video capture card. I chose the versatile Video Blaster SE100, which not only lets me grab stills but also saves complete video sequences to the hard disk as AVI files. It can also superimpose video onto other applications, in case I want to accompany a presentation with a full-motion image and don’t mind connecting all of this hardware to do so.
Technology gets tricky when you’re combining television images with computer graphics. Nice-looking video is not the same from screen to screen: TVs have terrible resolution compared to VGA monitors, which means that TV pictures aren’t, relatively speaking, as good as a high-resolution computer image. They’re smaller, for one thing – and you’ll see that when you get the Video Blaster card running. By default, the video image displays in its own small screen. Enlarge it and you’ll see some blockiness in the image.
The Video Blaster does a nice job of letting those two different environments co-exist. The old-fashioned way of configuring a special video adapter was to attach it to your existing VGA card by way of a feature connector. That’s a second video output (the first, of course, is the one into which you plug your monitor), and it consists of a row of pins near the top of your VGA card. The main problem with that, though, is a data path restricted to 256 colors.
 So the Video Blaster bypasses that problem by taking output right from the back of the VGA card and directing the full amount of data into its own input, letting you view the screen with all the colors you’re used to seeing. Some information is also needed from the feature connector, so you’ll have to run a ribbon cable from your VGA card to the Video Blaster, as described below.
There are no color restrictions on the video, because it’s fed to the Video Blaster card and plays directly on the screen, bypassing your VGA card. When you start the software that displays the video – it’s called VideoKit – you’ll see an ugly pink background where the video eventually plays. Drag another window on top of it and you’ll block the video – unless there’s an area in the top window that’s the same color pink.
It’s a process called chroma-keying, and you see it on television all the time. A particular color value is replaced by superimposed video, which lets the weather broadcast person walk around in front of a changing radar screen. What’s actually in the background is a blue screen (you may have seen it in the movie “Groundhog Day,” with Bill Murray as the hapless weather guy) – but if the person in front wears the right (or wrong) shade of blue, you’ll also see the video on parts of, say, a scarf or necktie.
 Because the video bypasses your VGA card, you can’t use conventional screen capture programs to freeze and save images. Fortunately, the VideoKit software does it for you, although you need a pretty quick trigger finger to stop the videotape at precisely the image you want to save. If you’re working from a VCR, you can use its slow-motion and frame-by-frame capabilities to get to the right spot.
 With a camcorder, you’re probably limited to a single playback speed, but the software has a helpful Strobe utility (it’s under the Effects menu) that freezes and briefly holds frames in increments of time that you can set to multiples of a tenth of a second. It doesn’t actually stop the tape; you get an electronic freeze that should give you just enough time to decide if you want to keep that particular image.
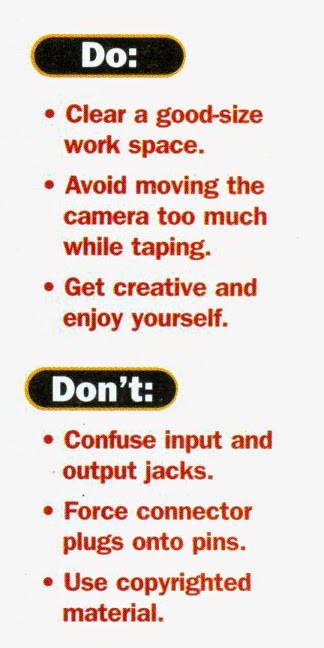
Back when the first caveman started taking home movies, the first rule was to hold the camera still. Subjects should do most of the moving; the camera should be restrained in its panning (sweeping from side to side) and tilting (tipping the camera up and down), and the worst offense of all is overuse of the zoom. As you’ll see when you start capturing stills, all of that causes blurry images, and you may not even be able to find anything worth saving if your camera is hyperkinetic.
Although we’re talking about capturing stills, let’s not forget the audio portion of our program. If you want to work with stretches of video, sound included, run a cable from your VCR or camcorder to your computer’s sound card. Both VCR and camcorder should have RCA plug outputs, two of them (colored white and red, red for right channel) if the machines are stereo. You’ll need a cable that has two RCA plugs on one end and a stereo mini-phone plug (the kind on the end of Walkman headphones) on the other.
If your VCR or camcorder has a mono audio track, look for a cable that has an RCA plug on one end and a mono mini-phone plug at the other, and get an adapter that sends the mono signal to both channels of the stereo plug. Radio Shack has them. Avoid using the headphone jack on the camcorder or VCR – that’s an amplified signal that may pick up distortion when it’s amplified again by your sound card.
As far as image quality goes, nothing is as good as a high-quality scan of a high-quality photo. Even the $1,000 digital cameras, handy as they are, leave a lot of resolution to be desired by comparison. But if you’ve already invested in a camcorder, a $250 video capture card brings you awfully close to digital camera quality, with the added bonus of letting you work from material you’ve already recorded. Just remember to keep that camera still!
 |
| Photos by Martin Benjamin |
Place your computer on a clean workspace. Discharge any static electricity your body may have accumulated by touching a metal surface. Remove the lid of your computer. Find a slot next to your VGA card. If a card is there already, move it to another slot. Press the Video Blaster card gently into place beside your VGA card. Replace the screws that hold the cards against the computer case.
TIP: The Video Blaster’s is set by default to use interrupt (IRQ) 10. If you know there’s a conflict in your system, move the jumper at block J1 to another setting. They’re marked, and your other options are 5, 11, 12, and 15.
 Step 2: Attach the feature connector cable.
A short ribbon cable comes with the Video Blaster. I attached one end of it to my VGA card’s feature connector, sliding the connector over two rows of 13 pins, making sure that the edge of the ribbon colored red was on the same side as pin 1. The other end of the cable, with a similar connector, slides over the pins on the Video Blaster card – again aligning pin 1 with the red edge.
TIP: Sometimes pin 1 is noted by a small triangle painted alongside it.
HINT: If there isn’t enough clearance in your machine, you’ll have to make this connection before the Video Blaster card goes into its motherboard slot.
 Step 3: Re-route your video card output.
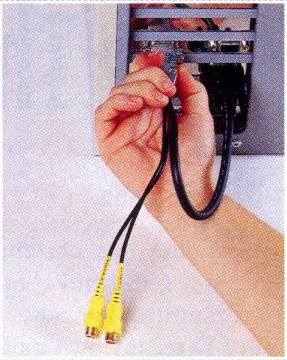
Another cable that ships with the Video Blaster has a VGA plug at each end and two RCA connectors hanging off one side. (It’s called the VGA loopback cable.) Plug the end with the RCA connectors into the VGA INPUT jack on the back of the Video Blaster card; plug the other end into the output jack on the back of your VGA card.
Step 4: Plug in your monitor.
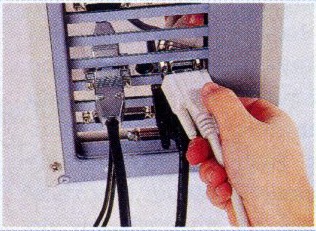
Secure the top of your computer and put it back where you normally use it. Plug your monitor cable into the VGA OUTPUT jack on the back of the Video Blaster card.
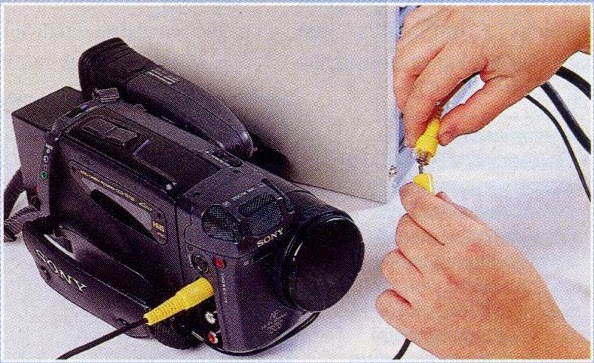 Step 5: Attach your video camera.
My Sony Hi-8 camera has a four-pin output called an S-Video jack, which, because it doesn’t combine the signal information for the three component colors, gives a slightly higher quality. If you don’t have that, use the standard RCA jack (it’s the same kind that’s on your stereo). S-Video uses a special cable that came with my camera and plugs right into the back of the Video Blaster card.

Make sure you have the Windows 95 drivers disk. I downloaded mine from Compuserve, but they should be shipping with the Video Blaster by the time you read this. Insert the first diskette in drive A:. Double-click on the Control Panel icon and select Add/Remove Programs. Click the Install button on the next window, and the Next button on the window after that. Windows will find the Setup program in drive A:; click Finish to bring up the InstallShield Wizard, which puts the drivers and software in the proper directories and creates a program group.
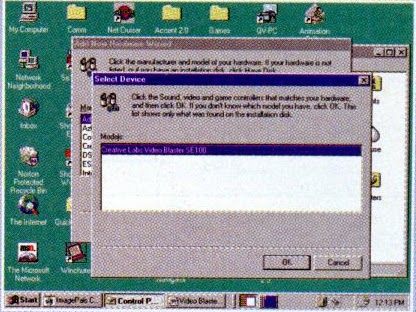 Step 7: Configure the hardware.
Choose “Add New Hardware” from the Control Panel. The Add New Hardware wizard screen comes up; click on Next. Windows 95 offers to search for your new hardware, which can be a time-consuming and fruitless mission, so select No and click Next. You’re then prompted to choose the type of hardware you’re installing: scroll down to and double-click on Sound, video and game controllers. At the next window, click Have Disk..., confirm that you want to copy from A:, and click OK. The next window lists Creative Labs Video Blaster SE100; click OK.
TIP: If conflicts are detected in your system, you’ll be prompted to run the Troubleshooting Wizard, which guides you through the process of identifying and working out the problem.

Start a videotape in your camcorder or VCR. From the new program group, select Video Blaster SE100 Setup. A sample screen appears in the middle of a box, and you’ll see your video playing. Set the color key clicking and dragging the bar marked No. of Pixel until the two white bars in the center have no pink showing, If the video image is off-center, adjust it by clicking and dragging the two slider bars at the bottom of the window; they’re labeled X Offset and Y Offset, and will let you place the video image on top of the pink chroma-key background. Click Save and then Close.
TIP: If your image does not appear in the screen, make sure that your input is properly selected. Click the Video tab at the top of the window, and pull down the Video Source box. My setting is S-Video; yours may be Input 0 or Input 1.
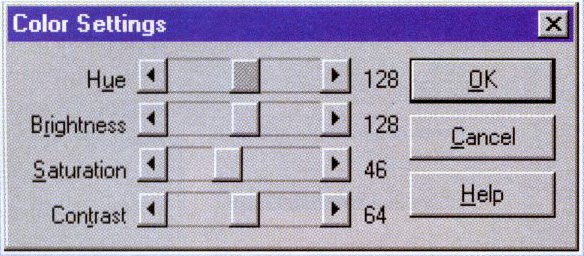 Step 9: Correct the color.
 Double-click the icon for the VideoKit program. Your video image will appear in the main window. If it doesn’t, pull down the Options menu and make sure your video input choice is correct. By clicking and dragging the edge of the main window, you can resize the display for better detail – although if you make it too large, the picture starts to look blocky. Pull down Options and select Color Settings, then use the slider bars to make sure the image on the screen has the correct color values.

Start the videotape you want to clip images from, and fast-forward it near the area you want to choose from. Pull down the Effects menu and select Strobe. After much experimentation, I settled on 3/10 of a second intervals – try it. Type “3" into the Interval box, and click OK. Now your image will stop and start continuously. When you see an image you want to save, click the hand icon on the toolbar, which holds the frame for you, and pull down the File menu and select Save. You’ll be prompted for a format – I like TIFF, which gives me 24-bit color – and a filename. You can go back later and edit or otherwise transform the saved image using your favorite paint program.
– Computer Life, February 1996
No comments:
Post a Comment